Managing Pages

Each project contains pages featuring the diagrams, data sheets, and documents you uploaded.
The following guides explain how to add and manage existing pages.
Adding Pages
You can add pages to existing projects. This lets you handle situations where you receive new documents after the start of a project, and saves you from having to split work across multiple projects.
Here's how to add pages to a project:
- Click UPLOAD FILES and select Add to an existing project.
- Select the project in which to add the documents.
-
Select the documents to add:
- Drag and drop
PDFsinto the upload box. - Click the upload box and select the
PDFs.
Tip
You can upload up to 100 pages of
PDFsper project. - Drag and drop
-
Click UPLOAD.
-
Complete the following based on the scenario:
- To extract common symbols automatically, click Select Options under Use my own configuration and select the symbols to extract.
- To extract symbols automatically based on a template, click Select Template under Use a template and click Select next to the template to use.
- To extract custom symbols, tables, or text, click Select Options and move on to the next step.
-
Review the thumbnails to decide the pages you want to add:
- Click a thumbnail to remove that page from the project.
- Click a thumbnail again to re-add that page.
-
Click PROCESS.
DataSeer uploads the documents to the project.
Important
When you upload new documents to a project, collaborators won't be able to access the project until the upload process is complete.
The LAUNCH button displays once the upload process is complete.
-
Click LAUNCH to start work on the new pages.
Editing a Diagram Number
The Diagram Number field on the toolbar displays the ID number of the diagram currently in view.

Here's how to edit a diagram number:
- Open the project.
- Click in the Diagram Number field on the toolbar.
- Edit the number.
- Press Enter
Replacing Pages
During the course of a project, there are numerous revisions made to the project's diagrams and documents. Managing and handling revisions can be tricky and keeping track of each revision is essential.
To help with this, the Diagram Revisions feature makes it easy to replace pages and track revisions. Just upload revisions as you receive them and DataSeer will keep an audit trail of the revision history for each page. This lets you maintain a single source of truth for your project documents.
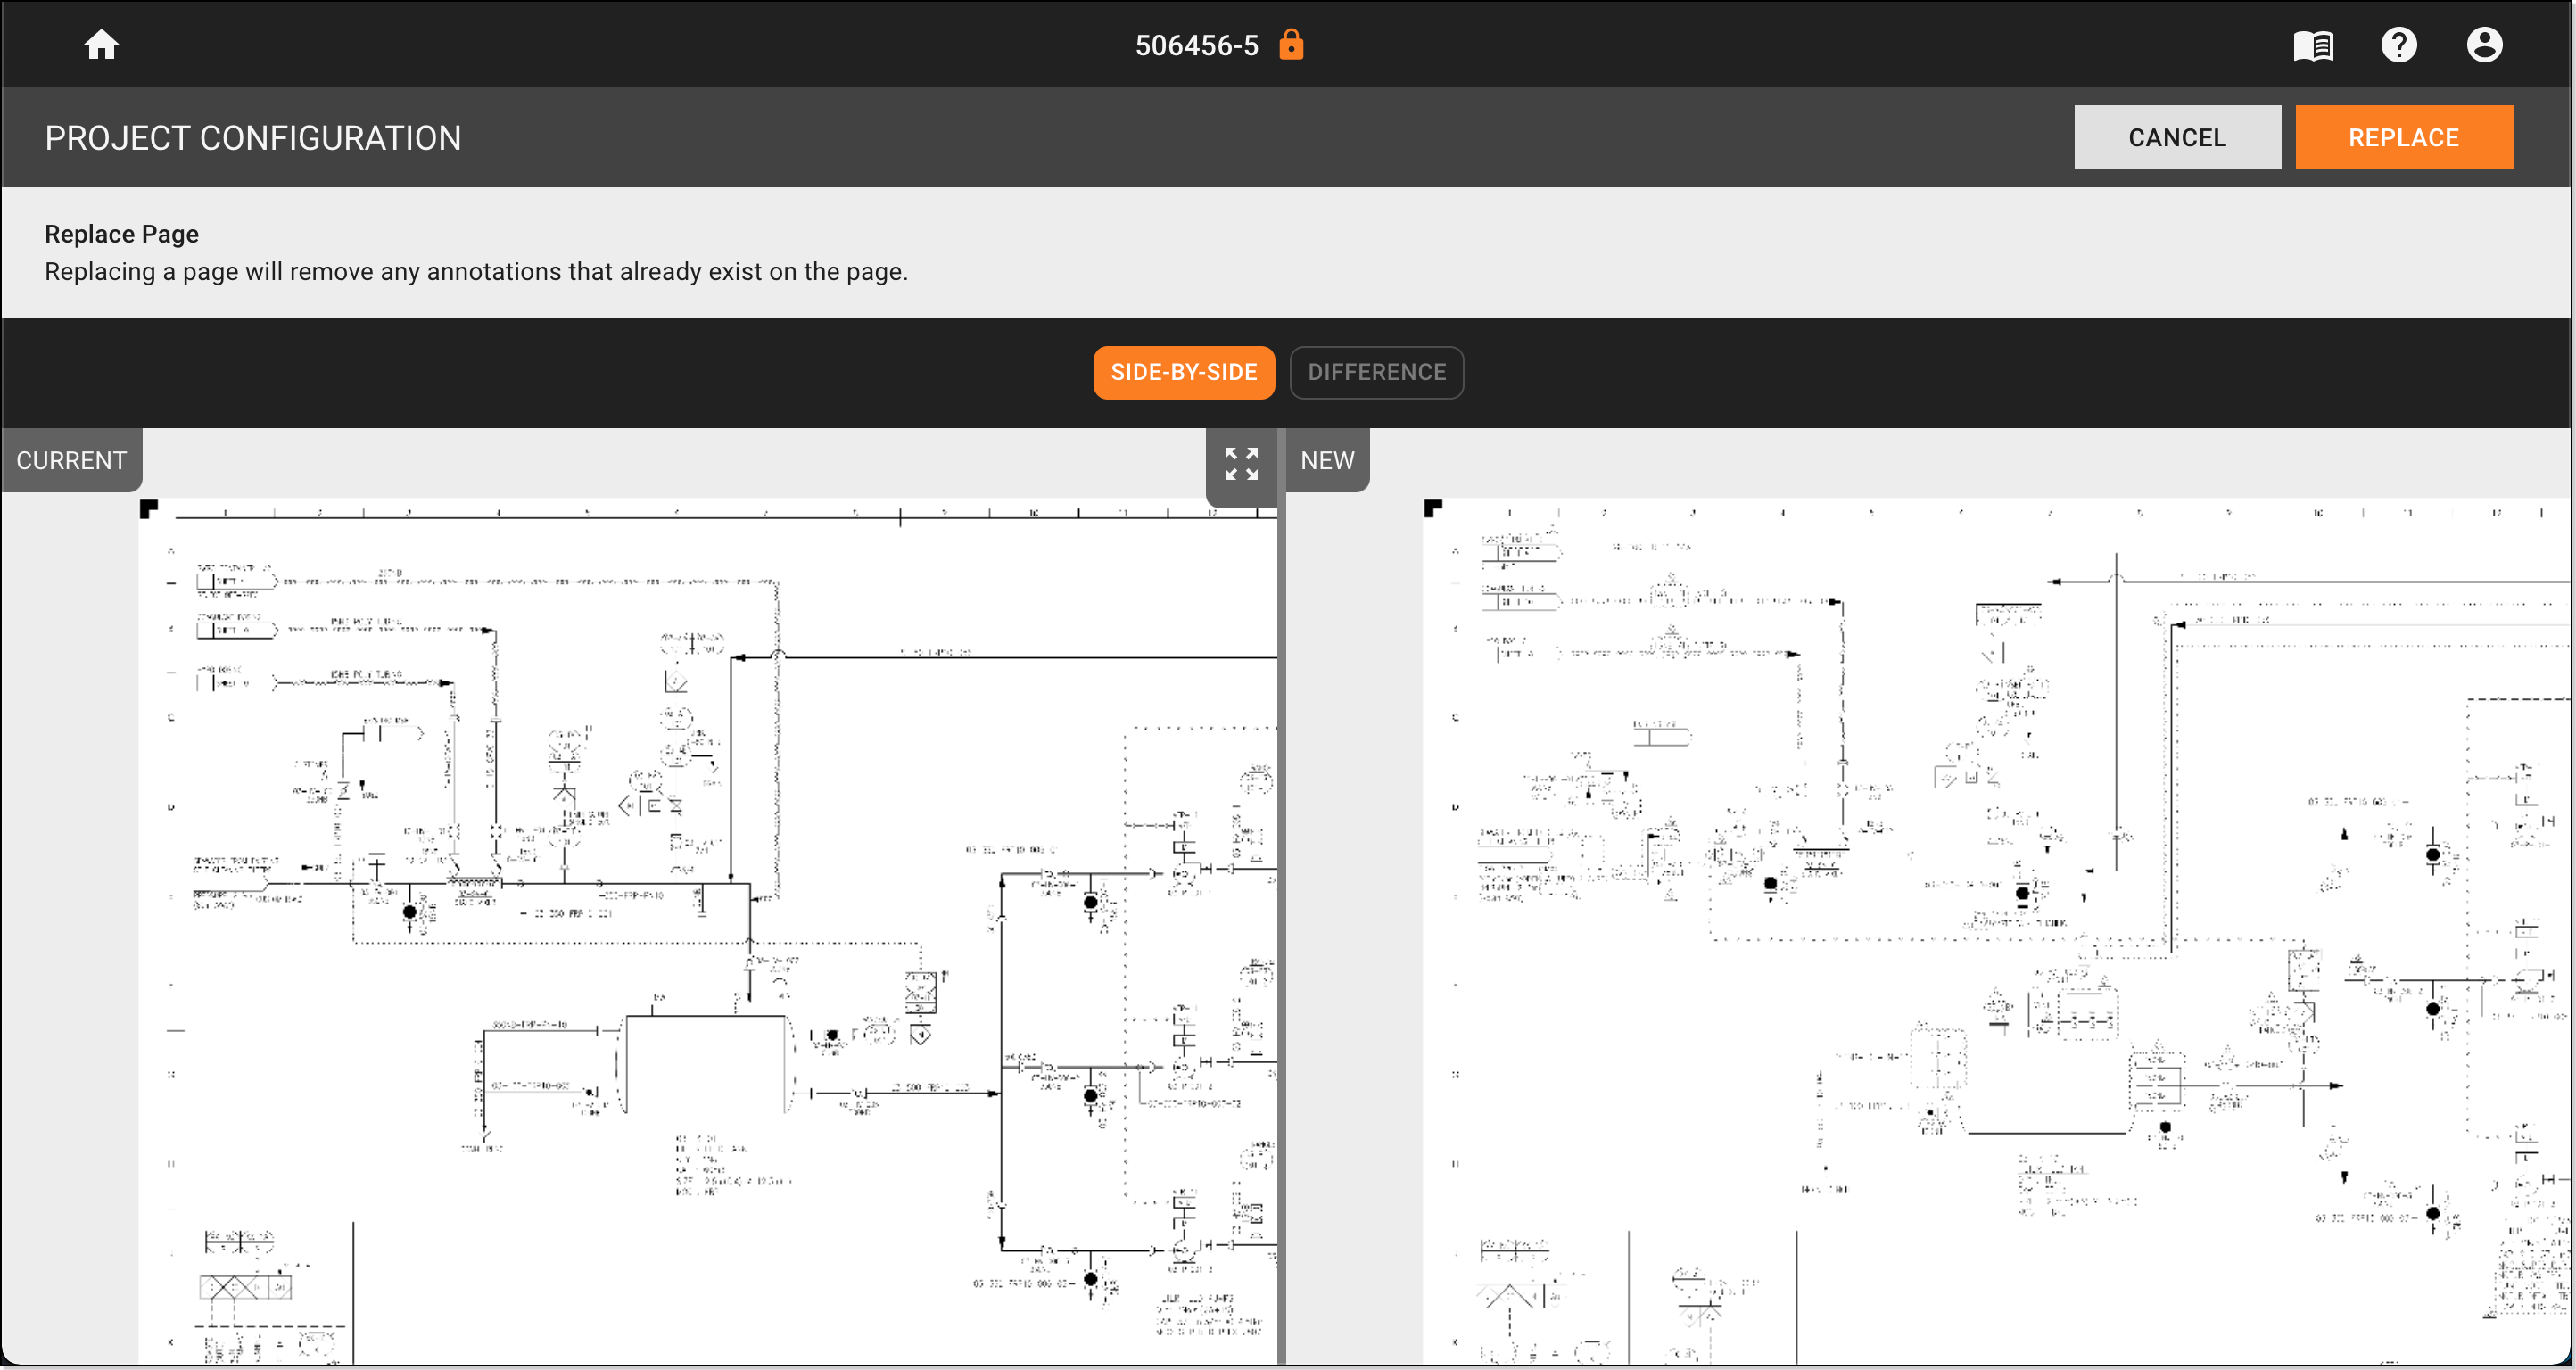
Here's how to replace a page with a revision:
- Open a project.
- Click Replace on the toolbar.
- Select the PDF featuring the replacement page.
- Click UPLOAD.
- Under Diagram Options, select the replacement page.
- Under Select Options, choose the symbols you want DataSeer to extract from the replacement page.
-
Click PROCESS.
The Project Library displays and DataSeer uploads the replacement page to the project.
Tip
The RESUME REPLACE button displays once the upload process is complete.
-
Click RESUME REPLACE on the project.
-
Compare the differences between the current and replacement page.
- Click Side-by-Side to compare the pages alongside each other.
- Pan and zoom on the Current panel (left side of the page) to focus in on specific differences.
- Click Difference to compare the pages on top of each other, with changes shown in black and existing details shown in gray.
- Click Side-by-Side to compare the pages alongside each other.
-
Click REPLACE to finish.
Locking Pages
Page locking will disable the ability for users to make edits to the data located on a specific page of their project. The function will also remove the locked pages from future Multi-Page searches so users may organically limit the scope of searching as they complete earlier pages of their project.
The following functions will become inactive once a page's locked status is enabled:
- Manual edits of the attribute edtior(for symbols located on a locked page)
- Multi-Page Symbol Search
- Attribute (Tag) Search
- Multi-Page Table Extraction
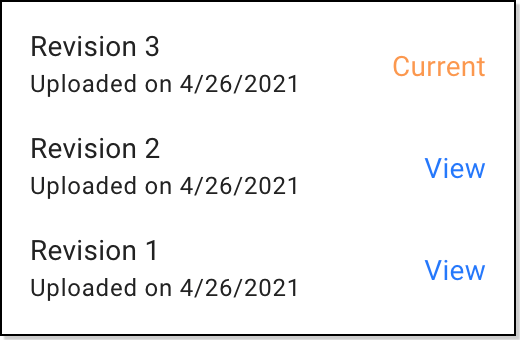
Viewing Revision History
Here's how to view the revision history for a page:
- Open a project.
- Open the page for which to view revision history.
-
Click Revision on the toolbar.
-
(Optional) Click a previous revision to display that version of the page.
- Click X at the top of the page to close the revision preview.
Printing Pages
The Print feature lets you print copies of pages that show the data currently extracted. This lets you do a visual check to ensure you have extracted all required items.
Here's how to print pages:
- Open the project.
- Click on the toolbar.
- Under Symbol Classes, select the extracted data to show on the printed pages.
- (Optional) Under Symbol Colors, select Single color and choose a color to highlight all items with the same color on the printed copies.
- Click Print.
- Print as normal.
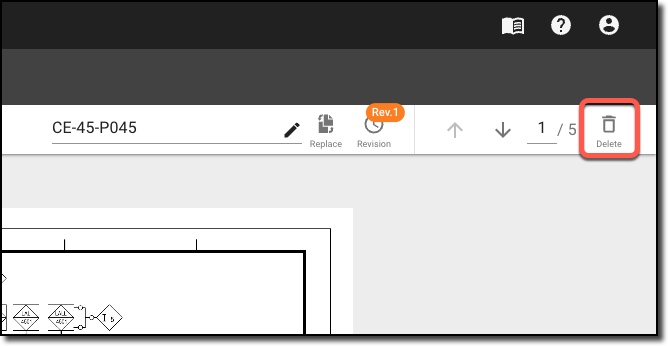
Deleting Pages
Here's how to permanently remove a page from your project:
- Open a project.
- Navigate to the desire page to be removed.
-
Click Delete on the toolbar.
-
Click Delete Page on the secondary confirmation prompt.